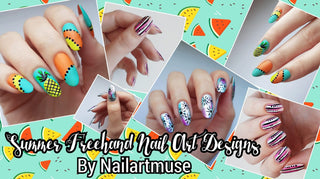
Hello everyone! My name is Zorana aka Nailartmuse and today I’ll be sharing with you some fun and easy summer nail art designs! Grab your nail polishes, brushes and dotting tools and let the fun begin!
If you follow me on Instagram or WordPress (which I think you definitely should) then you probably know that I often use stamping plates in order to create nail art designs. Nevertheless, I still enjoy good old freehand technique simply because it’s so fun, much more creative and gives you opportunity to actually practice your skills. That is why I decided to create three different freehand summer nail art designs for this occasion! And don’t be scared, they are very easy! Whether you are a pro or just a girl (or boy) who loves the art of decorating nails, I’m sure you will enjoy!
We are starting with the easiest summer nail art design– mix & match manicure. If you are not already familiar with this type of nail art now it’s the right time to try it! Mix & match manicures are perhaps my favorites because I get to combine different colors, prints, textures and shapes, which turns out to be absolutely amazing! This time I didn’t want to make anything crazy and hard to recreate, so I went for good old strikes and dots! Now, the best part about this design is that you actually don’t have to worry about drawing straight lines! I designed this manicure to be very abstract and asymmetrical, yet very cute and pulled together. All you will need is a thin nail art brush (or any other brush that works for you) and a dotting tool or some other item that will help you create small dots. My personal choice were white, black and pink colors, but you can surely pick your own combination! Before you begin, make sure that you have already applied base coat to protect your nails. Once you finish that first step take your nail art brush and start creating vertical lines alternating the three colors. As I have already mentioned, you don’t have to worry about creating perfectly straight lines. Also, you don’t have to cover the entire nail bed with polishes, let that small parts of your natural nails peek in order to achieve negative space effect! And now it’s time for dots! Dip your dotting tool in black nail polish and gently add few small dots between white and pink lines. Finish your manicure by applying matte top coat and you are done!


 Next design is a dry brush metallic manicure! Dry brush technique is another very popular technique in nail art world and I love it! It’s very easy to create this type of manicures, yet the results are marvelous! After applying base coat apply two thin coats of any metallic nail polish. I opted for this beautiful silver shade. Next you should grab pastel blue and purple color and start layering them. How to do that? Simply wipe your nail polish brush and get rid of the excess product until the brush is almost dry. Add one or two strikes over the metallic base and you will get a fun, abstract combination. Next thing you wanna do is pop three black dots on each nails and draw small black lines around them. Now you have small black suns on metallic, blue and purple base! Finish your manicure by applying glossy top coat and you are ready to rock this summer!


 Last but not least, we have a pineapple dotticure! Another cute mix and match freehand manicure that, I must admit, requires more artistic skills. After applying base coat paint all of your nails orange, except for the ring finger. Take your regular nail polish brush and slowly start layering yellow and blue shades over orange. Right on the lines where they meet each other apply few small black dots and your manicure is half done! Now paint your ring finger blue and once the base is completely dry add yellow ellipse for the pineapple. With green and black nail polishes draw few leaves above it. You can use a thin nail art brush or even a toothpick, just as long as you are careful. And now it’s time for cross lines. Again, use a very thin and long nail art brush and rest both of your hands on table. Work fast and try to make your black lines as even as possible. If you can’t achieve that, hey, what pineapple is perfect after all? Finish your design by applying matte top coat and enjoy!


 I really hope that you liked my ideas! If you decide to recreate some of these, please tag me so I can share your work with my Instagram squad! And don’t worry if sometimes your nail art doesn’t turn out perfect, that’s not the point of nail art anyway! The point is to find something that relaxes you, stimulates your creativity, makes you enjoy and brings colors into your life, even though it’s through manicure!
Until next time, xoxo