Have you ever found yourself gazing longingly at someone’s beautifully crafted manicure, only to find out they did it themselves at home?
“I’m just not good at doing my own nails. I have to go to the salon for them to look decent,” you might say.
The reality is, sometimes a beautiful at-home manicure can be a bit tricky, but that does not mean you need to surrender to pricey salon nails. With just a little bit of practice and some knowledge of this basic four-step process, you will be on the fast track to great nails in no time.
Keep on reading for a basic step-by-step tutorial on how to paint your nails. . . and actually like the end result!

It’s All in the Prep
If you want a long-lasting manicure, the first and most crucial step is to prep your nails appropriately, and this goes beyond just removing your previous nail polish. Once you have removed any remaining polish, if any, you will want to trim and shape your nails to fit your desired look. If at all possible, avoid trimming your nails too short, as nails with a little extra length will be easier for you to work with, and you are less likely to get polish all over your fingertips with the extra surface area to work on. Once trimmed, take a nail buff and smooth out the surface of your nail. Some nail surfaces naturally have more ridges and bumps, which can make the smooth and polished look difficult to achieve. Lastly, push back your cuticles as much as possible. This will give you clean lines around the edge of your nail and will prevent hangnails in the future. Be sure to wash your hands to remove any dust from filing/buffing your nails. Once you have completed this initial prep stage, you are ready to learn how to paint your nails!But First, Primer
While you will most likely be tempted to jump right in with your fun color of choice, you will want to take a moment to apply a thin base coat before doing anything else. What’s the significance of this step? Think of it like a face or eye primer when doing your make up. If you want your makeup to look its best and last as long as possible, you’ll put a primer on first. The same goes for a nail primer. Check out our Nail Rescue Primer, which also has nourishing ingredients to strengthen your nails in the process. If you are taking the time to make your nails look good, you might as well use a product that will make them healthy, as well!
Color Them Pretty
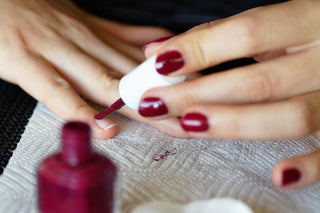
Once you wait for your coat of primer to dry, it is time for the fun part. . . applying the color! Begin with wiping most of the nail polish off your brush before applying it to your nail. It is important to remember that you can always add more product later. However, if you overdo it in the beginning with thick coats, you may end up with a mess on your hands (literally). Not to mention thick layers take much longer to dry. It will be tempting to apply the polish right at the base of your cuticle, but it is important to not do this! Start with the brush in the very middle of your nail and work your way out and down. This will help prevent your polish from dripping all over your cuticles. Apply one thin coat of color, and wait several minutes for it to dry. Now is the right time to have your favorite Netflix show on, so you can sit back and enjoy your moment of self-care. Once the first layer is semi-dry, follow these steps again for your second coat. If you are working with a light color or thin polish, you may need to do a third coat. However, most of the time, two will suffice. Not sure which color to choose? Be sure to check out our Instagram page for some color inspiration!Finish Them Off
Allow several minutes for your final layer of colored polish to dry. Once you feel confident your polish is no longer wet, it is time for a top coat. The top coat is an important step as you learn how to paint your nails for a couple of reasons:- It allows for a high-shine look that truly captures the salon-quality appearance.
- It is designed to be chip resistant, extending the life of your manicure.
Anita
I’d like to know which to sure first.
786 condition ridge vanish add 786 deep nutrient.
Thank in advance for you assistance.
Anita