Are you looking for some amazing DIY nail designs? We have a collection of some cool nail designs to try out. For most of these designs, you’d need different nail polish colors, a base coat, and a top coat. You might also need extra glitter polishes, fancy brushes, or stamping plates. Here are some of the best nail designs you can do all by yourself instead of visiting your local nail technician.
 2. Dotted Nail design
This is also easy to do and looks amazing. The idea is to paint your nails in any color to make a solid background, then to make micro dots using another nail polish color to make a gradient. All you need to do is make sure the colors look good together.
2. Dotted Nail design
This is also easy to do and looks amazing. The idea is to paint your nails in any color to make a solid background, then to make micro dots using another nail polish color to make a gradient. All you need to do is make sure the colors look good together.
 3. Ombre Nails
Ombre nails are a simple form of nail art and can be made with just five different nail polish colors that are in the same color family. It could be five different shades of red, pink, or blue. Once you get the materials ready, follow the steps below
i. Apply the nail primer in one thin coat over the nails. This will help strengthen the nails under the nail
polish .
ii. Choose five nail polish colors within the same color family i.e five different shades of a nail polish
color.
iii. Apply a thin coat of each color to each nail. Make sure you coat each nail with a different shade of nail
polish.
iv. Apply the second coat of each color once the first is fully dry.
v. You can add another top coat to finish it off.
4. Pink Gradient
This is also one of the easiest DIY nail polish designs as you can create different shades of pink just from one deep pink nail polish and white polish. The goal is to create a gradient using pink and white nail polish. To make this design, follow the steps below.
i. Coat your thumbnail with a deep pink nail polish.
ii. Make 4 different puddles of the deep pink nail polish.
iii. Add a drop of white nail polish to the first puddle. Add two to the second, three to the third, and four
drops to the fourth puddle.
iv. Mix each puddle separately. They should all have a different shade of pink.
v. Apply the color from each puddle on your nails to make a gradient.
vi. Add a top coat.
5. Lace nail design
This design looks sophisticated when done properly but it’s quite easy to make. The easiest method for this design is to use real lace as a template. All you need is a piece of lace, any nail polish color of your choice, and a makeup sponge. The design can then be done in five easy steps.
i. Apply any base coat of your choice.
ii. Get a piece of lace and wrap it around your nail.
iii. Apply the nail polish on the lace with a makeup sponge.
iv. Remove the lace straight away from the nail to prevent smudges.
v. Add a top coat and clean up any excess paint.
If you prefer to wear real lace instead, follow these steps;
i. Get a piece of lace for each nail
ii. Add a base coat that has a similar shade to your lace.
iii. Add a different nail polish color to all the areas except the inner edges.
iv. Apply a topcoat or clear polish
v. Glue the lace to the topcoat.
vi. Trim any hanging fabric with small scissors.
vii. Add another topcoat, preferably two or three times.
3. Ombre Nails
Ombre nails are a simple form of nail art and can be made with just five different nail polish colors that are in the same color family. It could be five different shades of red, pink, or blue. Once you get the materials ready, follow the steps below
i. Apply the nail primer in one thin coat over the nails. This will help strengthen the nails under the nail
polish .
ii. Choose five nail polish colors within the same color family i.e five different shades of a nail polish
color.
iii. Apply a thin coat of each color to each nail. Make sure you coat each nail with a different shade of nail
polish.
iv. Apply the second coat of each color once the first is fully dry.
v. You can add another top coat to finish it off.
4. Pink Gradient
This is also one of the easiest DIY nail polish designs as you can create different shades of pink just from one deep pink nail polish and white polish. The goal is to create a gradient using pink and white nail polish. To make this design, follow the steps below.
i. Coat your thumbnail with a deep pink nail polish.
ii. Make 4 different puddles of the deep pink nail polish.
iii. Add a drop of white nail polish to the first puddle. Add two to the second, three to the third, and four
drops to the fourth puddle.
iv. Mix each puddle separately. They should all have a different shade of pink.
v. Apply the color from each puddle on your nails to make a gradient.
vi. Add a top coat.
5. Lace nail design
This design looks sophisticated when done properly but it’s quite easy to make. The easiest method for this design is to use real lace as a template. All you need is a piece of lace, any nail polish color of your choice, and a makeup sponge. The design can then be done in five easy steps.
i. Apply any base coat of your choice.
ii. Get a piece of lace and wrap it around your nail.
iii. Apply the nail polish on the lace with a makeup sponge.
iv. Remove the lace straight away from the nail to prevent smudges.
v. Add a top coat and clean up any excess paint.
If you prefer to wear real lace instead, follow these steps;
i. Get a piece of lace for each nail
ii. Add a base coat that has a similar shade to your lace.
iii. Add a different nail polish color to all the areas except the inner edges.
iv. Apply a topcoat or clear polish
v. Glue the lace to the topcoat.
vi. Trim any hanging fabric with small scissors.
vii. Add another topcoat, preferably two or three times.
 Check out amazing color choices at 786Cosmetics.
And be sure to share with us on Instagram.
Check out amazing color choices at 786Cosmetics.
And be sure to share with us on Instagram.
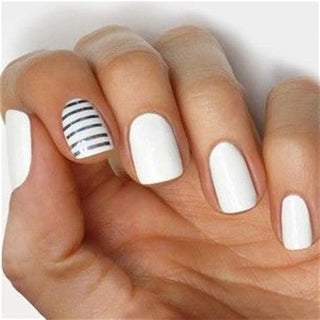
- Striped Accent design
 2. Dotted Nail design
This is also easy to do and looks amazing. The idea is to paint your nails in any color to make a solid background, then to make micro dots using another nail polish color to make a gradient. All you need to do is make sure the colors look good together.
2. Dotted Nail design
This is also easy to do and looks amazing. The idea is to paint your nails in any color to make a solid background, then to make micro dots using another nail polish color to make a gradient. All you need to do is make sure the colors look good together.
 3. Ombre Nails
Ombre nails are a simple form of nail art and can be made with just five different nail polish colors that are in the same color family. It could be five different shades of red, pink, or blue. Once you get the materials ready, follow the steps below
i. Apply the nail primer in one thin coat over the nails. This will help strengthen the nails under the nail
polish .
ii. Choose five nail polish colors within the same color family i.e five different shades of a nail polish
color.
iii. Apply a thin coat of each color to each nail. Make sure you coat each nail with a different shade of nail
polish.
iv. Apply the second coat of each color once the first is fully dry.
v. You can add another top coat to finish it off.
4. Pink Gradient
This is also one of the easiest DIY nail polish designs as you can create different shades of pink just from one deep pink nail polish and white polish. The goal is to create a gradient using pink and white nail polish. To make this design, follow the steps below.
i. Coat your thumbnail with a deep pink nail polish.
ii. Make 4 different puddles of the deep pink nail polish.
iii. Add a drop of white nail polish to the first puddle. Add two to the second, three to the third, and four
drops to the fourth puddle.
iv. Mix each puddle separately. They should all have a different shade of pink.
v. Apply the color from each puddle on your nails to make a gradient.
vi. Add a top coat.
5. Lace nail design
This design looks sophisticated when done properly but it’s quite easy to make. The easiest method for this design is to use real lace as a template. All you need is a piece of lace, any nail polish color of your choice, and a makeup sponge. The design can then be done in five easy steps.
i. Apply any base coat of your choice.
ii. Get a piece of lace and wrap it around your nail.
iii. Apply the nail polish on the lace with a makeup sponge.
iv. Remove the lace straight away from the nail to prevent smudges.
v. Add a top coat and clean up any excess paint.
If you prefer to wear real lace instead, follow these steps;
i. Get a piece of lace for each nail
ii. Add a base coat that has a similar shade to your lace.
iii. Add a different nail polish color to all the areas except the inner edges.
iv. Apply a topcoat or clear polish
v. Glue the lace to the topcoat.
vi. Trim any hanging fabric with small scissors.
vii. Add another topcoat, preferably two or three times.
3. Ombre Nails
Ombre nails are a simple form of nail art and can be made with just five different nail polish colors that are in the same color family. It could be five different shades of red, pink, or blue. Once you get the materials ready, follow the steps below
i. Apply the nail primer in one thin coat over the nails. This will help strengthen the nails under the nail
polish .
ii. Choose five nail polish colors within the same color family i.e five different shades of a nail polish
color.
iii. Apply a thin coat of each color to each nail. Make sure you coat each nail with a different shade of nail
polish.
iv. Apply the second coat of each color once the first is fully dry.
v. You can add another top coat to finish it off.
4. Pink Gradient
This is also one of the easiest DIY nail polish designs as you can create different shades of pink just from one deep pink nail polish and white polish. The goal is to create a gradient using pink and white nail polish. To make this design, follow the steps below.
i. Coat your thumbnail with a deep pink nail polish.
ii. Make 4 different puddles of the deep pink nail polish.
iii. Add a drop of white nail polish to the first puddle. Add two to the second, three to the third, and four
drops to the fourth puddle.
iv. Mix each puddle separately. They should all have a different shade of pink.
v. Apply the color from each puddle on your nails to make a gradient.
vi. Add a top coat.
5. Lace nail design
This design looks sophisticated when done properly but it’s quite easy to make. The easiest method for this design is to use real lace as a template. All you need is a piece of lace, any nail polish color of your choice, and a makeup sponge. The design can then be done in five easy steps.
i. Apply any base coat of your choice.
ii. Get a piece of lace and wrap it around your nail.
iii. Apply the nail polish on the lace with a makeup sponge.
iv. Remove the lace straight away from the nail to prevent smudges.
v. Add a top coat and clean up any excess paint.
If you prefer to wear real lace instead, follow these steps;
i. Get a piece of lace for each nail
ii. Add a base coat that has a similar shade to your lace.
iii. Add a different nail polish color to all the areas except the inner edges.
iv. Apply a topcoat or clear polish
v. Glue the lace to the topcoat.
vi. Trim any hanging fabric with small scissors.
vii. Add another topcoat, preferably two or three times.
 Check out amazing color choices at 786Cosmetics.
And be sure to share with us on Instagram.
Check out amazing color choices at 786Cosmetics.
And be sure to share with us on Instagram.